
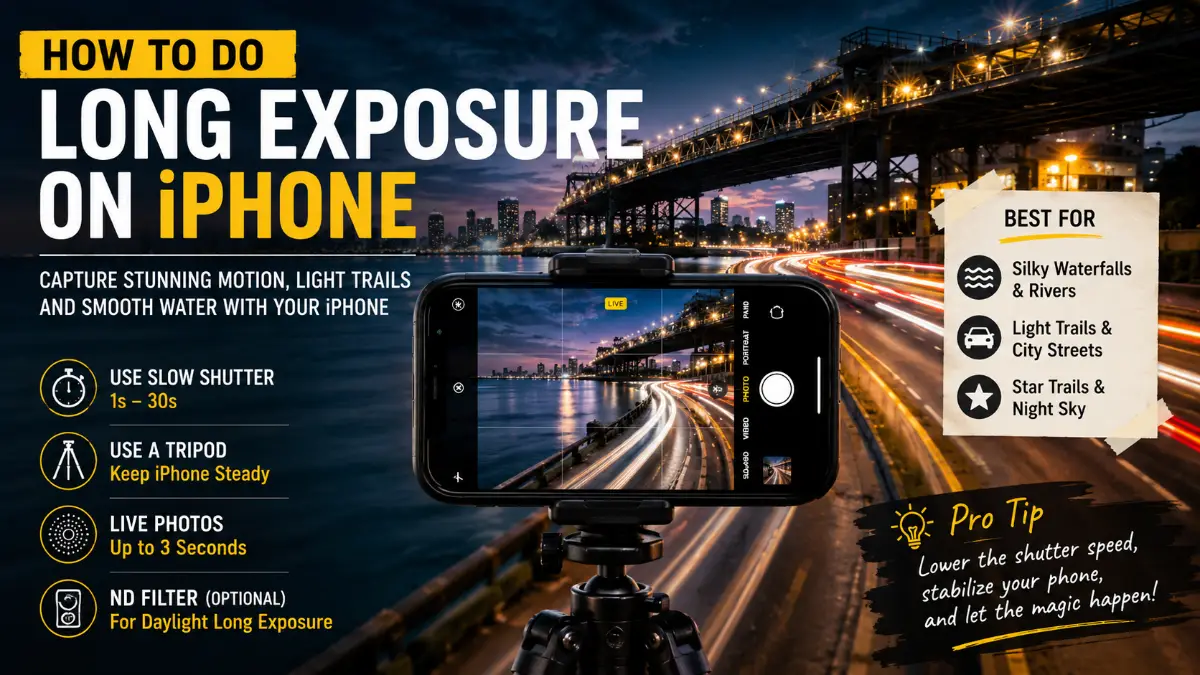
Learning how to do long exposure on iphone becomes much easier once you understand what the phone is actually doing. Apple gives you a built-in Long Exposure effect through Live Photos, but it is not a conventional manual shutter-speed mode. Night mode works differently again, and specialized camera apps add their own approaches for longer light trails, star trails, silky water, and other creative effects.
That distinction matters. A Live Photo records approximately 1.5 seconds before and 1.5 seconds after you take the picture, and Apple’s Photos app can use that recorded motion to create a Long Exposure effect. Apple itself describes the feature as simulating a DSLR-like long exposure by blurring motion. Once you understand that, choosing the correct technique for water, traffic, night scenes, or stars becomes much more straightforward.
How to Do Long Exposure on iPhone With the Built-In Method
The easiest method requires nothing beyond the Camera and Photos apps already on your iPhone.
Here is the process:
- Open the Camera app.
- Select Photo mode.
- Make sure Live Photos is turned on.
- Choose a subject containing visible movement.
- Hold the iPhone as steadily as possible.
- Take the Live Photo.
- Open it in the Photos app.
- Tap the Live control near the top of the image.
- Select Long Exposure.
Apple’s current instructions confirm that Long Exposure is one of the effects available for Live Photos. The result works especially well when one part of the composition moves while another stays still-for example, flowing water surrounded by stationary rocks.
What Apple’s Long Exposure Effect Actually Does
A common explanation says the iPhone simply takes a three-second long exposure. That is not technically accurate.
Apple says a Live Photo records what happens approximately 1.5 seconds before and 1.5 seconds after the picture is taken. The Long Exposure option then uses that Live Photo to create a motion-blur effect. Apple describes the result as a simulated DSLR-like long exposure rather than a conventional manual slow-shutter capture.
Live Photo duration is not shutter speed
The approximately three-second Live Photo window should not be interpreted as a three-second shutter speed.
Those are different concepts.
A traditional long exposure gives a photographer direct control over the time during which light contributes to the image. Apple’s Live Photo method instead starts with a short recorded sequence and applies a computational effect to its motion.
That is why you cannot open Apple’s Long Exposure control and choose:
- 5 seconds
- 10 seconds
- 30 seconds
- 2 minutes
There is no native duration slider for the Live Photo Long Exposure effect.
Also Read: Long Exposure iPhone Photography: Waterfalls, Light Trails, and Stars
Why stationary objects matter
Long-exposure photography looks convincing when the viewer sees two things simultaneously:
- intentional blur from moving elements,
- sharp detail in stationary elements.
If the iPhone moves during capture, buildings, rocks, railings, and other supposedly static subjects may blur too. Apple specifically advises users to hold the device still while taking a Live Photo. This is why stability matters even though the built-in feature is computational.
Does the iPhone Have Manual Long Exposure Settings?
The stock Live Photo Long Exposure effect does not provide traditional manual shutter-duration controls. However, that does not mean every iPhone photography feature is limited to a single instantaneous exposure. Night mode, for example, can take several seconds to complete a photograph when the scene is dark enough. Apple also lets users choose from the available Night mode exposure options on supported devices.
Therefore, it is more accurate to separate three different workflows:
| Method | Primary Purpose | Duration Control | Best Use |
| Live Photo Long Exposure | Creative motion blur | No manual duration setting | Water, people, short motion |
| Night mode | Better low-light capture | Scene-dependent exposure options | Night landscapes and city scenes |
| Specialized camera app | Extended/specialized capture | Depends on app | Light trails, star trails, advanced blur |
These methods can produce superficially similar results, but they are not interchangeable.
Live Photos Long Exposure iPhone Technique for Water
Water is one of the easiest subjects for beginners because it supplies continuous movement.
The built-in method can work well with:
- waterfalls,
- fountains,
- streams,
- small rapids,
- waves moving around rocks,
- water flowing beneath a bridge.
Compose around something stationary
Do not fill the entire frame with moving water. Include rocks, plants, a bridge, shoreline, architecture, or another static reference. The viewer then sees a clear contrast between sharp and blurred areas.
Stabilize before pressing the shutter
For a handheld attempt:
- Use both hands.
- Keep your elbows near your torso.
- Stand with your feet comfortably apart.
- Lean against something stable if possible.
- Keep holding the phone steady immediately after taking the picture.
A small tripod or solid surface can improve consistency further.
Take several attempts
Do not judge the method from one photo. The exact shape of moving water changes constantly, so several otherwise identical Live Photos can produce noticeably different final effects. Capture multiple versions and choose the one with the best combination of sharp static detail and smooth-looking water.
How to Create Traffic Light Trails
Traffic is more demanding than flowing water because dramatic headlight and taillight trails usually benefit from a longer period of movement. The built-in Live Photo effect can still produce creative traffic blur, but its source motion is limited to the short Live Photo sequence.
When you want longer trails, use a specialized app. One current example is Spectre Camera, whose App Store listing says it can turn city streets into light trails, remove moving crowds, smooth waterfalls, and capture computational long exposures up to 30 seconds.
For traffic photography:
- position yourself somewhere safely separated from vehicles,
- keep road signs, buildings, or the road itself sharp,
- frame the direction vehicles travel through the scene,
- stabilize the phone,
- use an app’s light-trail or longer-duration feature when the native effect is too short.
Never stand in the roadway or compromise safety to improve the composition.
How to Photograph Star Trails on iPhone
Star trails are not a realistic target for the native Live Photo Long Exposure effect because they require a much longer observation of apparent star movement. This is where a specialized astrophotography app becomes appropriate.
NightCap Camera’s current App Store listing includes a dedicated Star Trails mode as well as long-exposure and light-trail functions. Its current version also advertises exposures lasting seconds or minutes.
Use a stable composition
Even though NightCap’s current version advertises frame alignment designed to support handheld long exposures, a tripod remains useful for keeping a star-trail composition consistently framed.
Choose a scene that includes foreground interest such as:
- a tree,
- a building,
- a mountain silhouette,
- an open landscape.
The stationary foreground can give the trails context and scale.
Night Mode Long Exposure on iPhone Explained
Night mode long exposure iPhone searches often mix two separate ideas together.
Night mode is not Apple’s Live Photo Long Exposure effect. Apple says Night mode automatically activates on supported iPhones when the Camera app detects a low-light environment. Depending on the darkness of the scene, the capture can be quick or take several seconds. Users can also select from available exposure options.
Night mode is therefore most useful when the goal is:
- brighter night scenes,
- better visible detail in darkness,
- cityscapes after sunset,
- low-light landscapes,
- stationary architecture,
- more controlled handheld or tripod-assisted night photography.
Live Photos and Night mode have an important limitation
Apple states that when Night mode is active, Live Photos are not active by default. If you manually turn Live Photos on, Night mode is deactivated. That means you should usually choose the feature that matches your goal:
Want creative motion blur? Use a Live Photo and Long Exposure.
Want a better low-light photograph? Use Night mode. Trying to treat them as the same feature leads to unnecessary confusion.
Why Long Exposure Sometimes Does Not Appear
If the Long Exposure option is missing, start by checking the source image. Apple provides Long Exposure specifically as an effect for Live Photos.
Common causes include:
- the picture was captured as a normal still,
- the file is a screenshot,
- the image was exported without its Live Photo information,
- a third-party editing workflow affected its Live Photo data,
- you are looking at an image that was never a Live Photo.
Apple also warns that editing a Live Photo in a third-party app can cause applied Live Photo effects to be lost.
A useful troubleshooting test is simple: capture a brand-new Live Photo directly in Apple’s Camera app, open it immediately in Photos, and check whether Long Exposure appears.
Can You Apply Long Exposure to Any Existing Photo?
Not with Apple’s native Live Photo method. A normal single-frame photo does not contain the Live Photo motion sequence required by the effect.
You may have many older images in your library that are eligible, however, because Live Photos is normally enabled by default unless you have changed your Camera settings. Apple also allows the last Live Photo preference to be preserved in Camera settings. Open your Live Photos collection in Photos to see which existing shots can be tested.
Do You Need an ND Filter?
An ND, or neutral-density, filter reduces incoming light. In traditional daytime long-exposure photography, this can be valuable because less incoming light allows slower shutter settings without making the photograph excessively bright.
For the native Live Photo Long Exposure effect, however, an ND filter does not transform the feature into a manually adjustable shutter exposure or extend the Live Photo recording window. Whether an ND filter helps with a third-party app depends on that app’s capture method and the lighting conditions.
It is therefore incorrect to treat an ND filter as essential equipment for everyone learning iPhone long exposure photography. Master stability, movement, composition, and subject choice first.
Do You Need a Tripod?
Not always.
A beginner can create a good Live Photo Long Exposure while handholding the iPhone carefully.
A tripod becomes more valuable when:
- stationary details must remain very sharp,
- you are working at night,
- your capture lasts longer,
- you repeatedly photograph the same composition,
- you are shooting stars,
- you are creating extended traffic trails.
Apple recommends keeping the device steady for Live Photos and specifically recommends a stable surface or tripod for clearer Night mode captures.
Third-party stabilization is also improving. NightCap’s current version advertises frame alignment that can enable handheld long-exposure work, showing why claims that a tripod is absolutely mandatory for every app are too broad.
Best iPhone Long Exposure Settings by Scene
There is no universal combination of iPhone long exposure settings because each method works differently.
A scene-based approach is more useful.
| Scene | Recommended Starting Method | Main Priority |
| Small waterfall | Live Photo Long Exposure | Camera stability |
| Fountain | Live Photo Long Exposure | Continuous movement |
| Ocean waves | Live Photo Long Exposure | Stable foreground |
| Walking pedestrians | Live Photo Long Exposure | Static architecture |
| Night cityscape | Night mode | Hold still during capture |
| Traffic trails | Long-exposure app | Longer motion capture |
| Light painting | Long-exposure app | Controlled movement |
| Star trails | Astrophotography app | Stable framing |
Treat this table as a starting point rather than a rigid rule. Creative photography often improves through experimentation.
Why Your Long Exposure Looks Wrong
Understanding the failure tells you what to change.
Everything is blurry
The phone likely moved. Stabilize the device and try again.
Nothing looks different
There may not have been enough subject movement. Choose flowing water, passing people, traffic, or another moving element.
The water looks chaotic rather than smooth
Try a more predictable section of the flow and capture several versions.
Traffic trails are extremely short
You are probably asking too much of the short Live Photo sequence. Switch to a dedicated light-trail or long-exposure app.
The night photograph is dark or noisy
If your primary objective is low-light detail instead of motion blur, use Night mode and stabilize the phone.
The Long Exposure menu is missing
Verify that the source is actually a Live Photo and has retained its Live Photo information.
How to Take Long Exposure Photos on iPhone More Consistently
When practicing how to take long exposure photos on iPhone, use a repeatable workflow rather than changing everything between shots.
- Decide whether your goal is motion blur or low-light detail.
- Choose Live Photo Long Exposure for short creative motion.
- Choose Night mode for low light.
- Choose a specialized app when you require longer movement.
- Put at least one stationary object in the frame.
- Stabilize the iPhone.
- Capture several versions.
- Compare the stationary areas first.
- Then compare the movement pattern.
- Refine your composition and repeat.
This workflow removes much of the guesswork. Instead of asking whether an iPhone “can do long exposure,” you start asking the more useful question: which iPhone technique matches this scene?
Frequently Asked Questions.
Does the iPhone really have a long exposure feature?
Yes. Apple provides a Long Exposure effect for Live Photos. Apple describes it as simulating a DSLR-like long exposure by blurring motion rather than as a conventional manual shutter-speed setting.
Is the iPhone Long Exposure effect exactly three seconds?
No. A Live Photo records approximately 1.5 seconds before and 1.5 seconds after the picture is taken, but that should not be described as a conventional three-second shutter exposure. Long Exposure processes the Live Photo’s recorded motion.
Can I extend the built-in Long Exposure to 10 or 30 seconds?
Apple’s Live Photo Long Exposure control does not provide a manual duration selector. For longer computational captures, use a specialized app. Spectre, for example, currently supports long exposures up to 30 seconds.
Can I use a normal photo for Apple’s Long Exposure effect?
No. The built-in effect requires a Live Photo because it relies on the motion information recorded with that image.
Why is Long Exposure missing from my photo?
The most likely explanation is that the image is not a Live Photo or no longer retains the relevant Live Photo information. Apple lists Long Exposure specifically among Live Photo effects.
Is Night mode the same as Long Exposure?
No. Night mode is designed primarily to improve low-light photography and may take several seconds to capture a scene. Live Photo Long Exposure is a separate effect designed to blur motion.
Can I use Live Photos and Night mode together?
Not normally as simultaneous active modes. Apple states that manually turning on Live Photos while Night mode is active deactivates Night mode.
What subject should a beginner photograph first?
Try a fountain, waterfall, or stream. Continuous water movement is easy to see, while rocks or nearby structures provide stationary reference points.
Can an iPhone photograph real-looking star trails?
Yes, with an appropriate specialized app. NightCap currently includes a dedicated Star Trails mode and long-exposure tools designed for captures lasting seconds or minutes.
What is the best way to learn how to do long exposure on iphone?
Begin with Live Photos and moving water because the built-in technique costs nothing and teaches stability, composition, and motion. Then use Night mode for low-light scenes and move to specialized long-exposure or astrophotography apps when you need longer light trails or star trails.
