
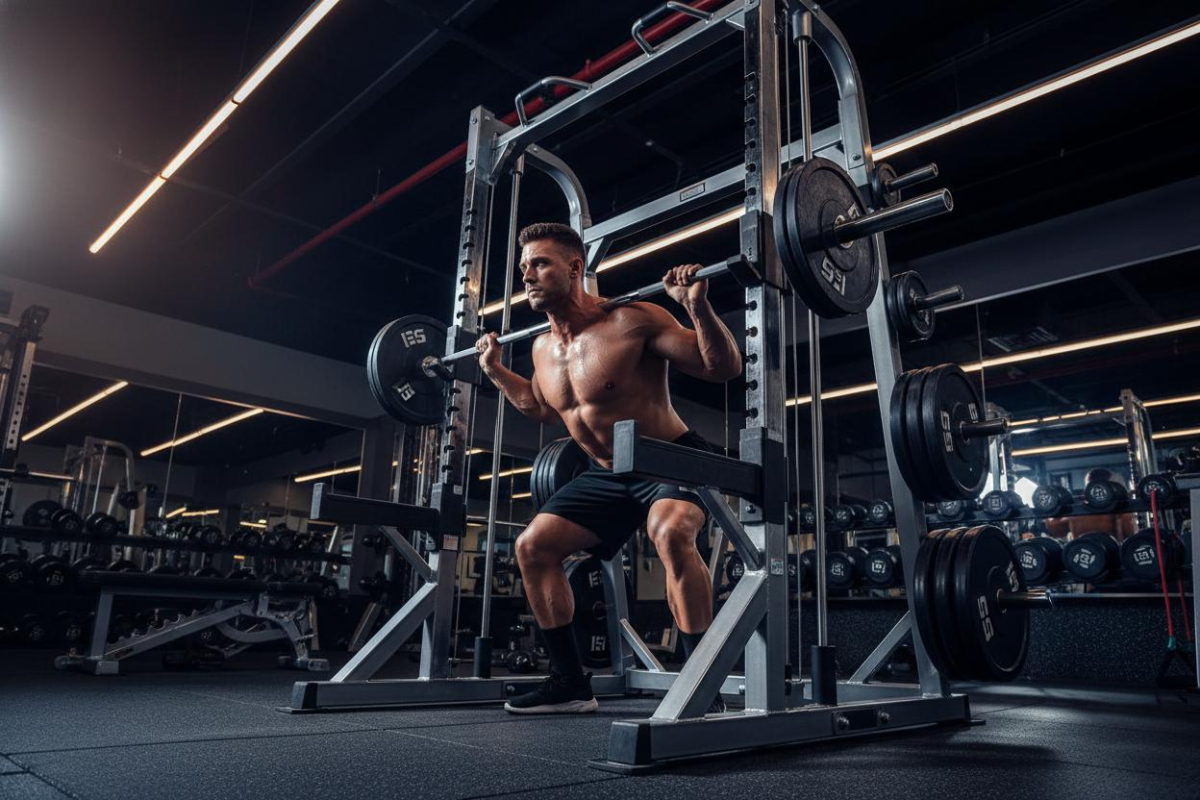
If your smith machine squat feels stiff, your knees complain halfway through a set, or you’re not sure whether the numbers on the bar even mean anything, you’re running into the same friction most lifters hit with this equipment. None of it means the machine is flawed-it usually means the setup doesn’t match your body, and small adjustments fix almost everything.
This guide walks through how to use a smith machine correctly, the fixes for common discomfort, how it compares to free weights, and how to build it into a results-driven workout plan.
Smith Machine Snapshot
A smith machine locks a barbell onto vertical or angled rails so it can only travel in one plane, with catch hooks that let you lift alone without a spotter.
- Good for: solo training, muscle isolation, controlled failure sets, beginners building confidence
- Not ideal for: athletic performance, powerlifting-specific prep, anyone whose movement pattern clashes with a fixed rail
- Key fact: the bar is usually counterbalanced, so it lifts lighter than its labeled weight suggests
Decoding the Equipment
Every smith machine restricts the bar to a single plane of movement using steel guide rails, but not all designs behave the same way.
Vertical-track machines move the bar in a perfectly straight line up and down. Linear-converging (angled) machines let the bar travel along a slight diagonal, which more closely follows the natural arc your body makes during a squat or press, generally making it easier on the knees and shoulders.
The other detail that trips people up is bar weight. A counterbalance system, usually a cable running to a weight stack inside the frame, offsets a portion of the bar’s real mass. Depending on the machine, an unloaded bar might only require somewhere between 4kg and 9kg of actual lifting effort-nowhere near a standard 20kg Olympic barbell. Check the printed specification or ask a staff member before converting your numbers into free-weight equivalents.
How to Use a Smith Machine Correctly
- Adjust the safety catches to sit just below your lowest range of motion for the exercise-this is the step that makes solo training safe, and skipping it removes the machine’s main advantage.
- Set the bar height: shoulder level for squats, chest level for bench press, hip or knee height for rows and hinge movements.
- Load the bar evenly and lock plates in place with collars.
- Take your position, brace your core, and grip the bar.
- Rotate your wrists forward to release the bar from the hooks.
- Complete the rep under full control, keeping tension on the target muscle.
- Rotate your wrists backward to re-engage the hooks, and confirm the bar is locked before releasing your grip.
Troubleshooting Common Pain Points
Most complaints about this equipment trace back to a mismatch between your body’s natural movement arc and the machine’s fixed path, not a flaw in the concept itself.
Also Read: Bonefish Grill
| Symptom | Likely Cause | Fix |
| Knee pain during squats | Feet positioned directly under the bar, forcing knees forward | Move feet 6–12 inches in front of the bar’s line to let hips travel back naturally |
| Shoulder pinching on bench press | Bench positioned too far forward relative to the bar path | Center the bench so the bar lowers to mid-chest, not the collarbone |
| Lower back strain on squats | Standing too upright against a purely vertical track | Allow a slight forward torso lean instead of forcing an artificially straight spine |
| Bar feels unexpectedly light | Counterbalance mechanism offsetting true bar weight | Check the printed bar weight before comparing to free-weight numbers |
| Set feels unstable despite fixed rail | Uneven plate loading or missing collars | Load both sides evenly and always secure plates with collars |
| Discomfort persists after adjustment | Underlying mobility limitation or old injury | Consult a physical therapist or coach rather than pushing through pain |
Matching the Machine to Your Body
Because the rail doesn’t move to accommodate you, your stance and positioning have to compensate, and the right adjustment depends on your proportions.
Lifters with longer femurs relative to their torso generally need more forward foot placement (around 10–12 inches from the rail) so their hips can sit back without excessive torso lean. Shorter-limbed lifters often need less offset, closer to 6 inches, since their natural squat path already stays close to vertical. If knee discomfort continues after adjusting stance, reduce the load before assuming the exercise itself is the problem-in most cases, positioning is the real variable at fault.
Is It Actually Cheating? What the Evidence Shows
No-this is one of the most persistent myths in gym culture, and it doesn’t survive contact with the research. Muscle growth depends primarily on mechanical tension applied to the muscle fiber, not on how much balance or stabilization a lift demands. A 2023 meta-analysis comparing machine-based and free-weight training found no statistically significant difference in hypertrophy outcomes when volume and effort were matched between groups.
Where the two approaches genuinely diverge is strength specificity. A systematic review found that free-weight training produced greater strength gains when tested on free-weight lifts, while machine-based training produced greater gains when tested on machine-based lifts-meaning the skill and strength built on a smith machine doesn’t fully transfer to a free barbell, and vice versa. This is a specificity issue, not a quality issue.
Smith Machine vs Free Weights: Choosing by Goal
| Your Goal | Better Choice | Reason |
| Building visible muscle size | Either works equally well | Hypertrophy outcomes are comparable when volume and effort match |
| Preparing for a free-barbell competition | Free weights | Strength transfer is specific to the equipment you train on |
| Training alone without a spotter | Smith machine | Safety catches function as a built-in spotter for near-failure sets |
| Developing balance and core stability | Free weights | The fixed rail removes most stabilizer demand |
| Working around a joint limitation | Case-by-case | Some conditions benefit from a controlled path, others worsen with a fixed angle, so check with a professional |
| Home gym with limited space | Smith machine | One station covers squats, presses, and rows |
Smith Machine Exercises and Muscles Worked
| Exercise | Muscles Worked | Setup Cue | Rep Range |
| Back squat | Quadriceps, glutes | Feet forward of the rail based on your proportions | 8–12 (hypertrophy), 12–15 (beginners) |
| Split squat, rear foot elevated | Quadriceps, glutes | Rear foot on a bench behind you | 10–12 per leg |
| Romanian deadlift | Hamstrings, glutes | Bar at hip height, minimal knee bend, hinge from the hips | 10–12 |
| Hip thrust | Glutes | Upper back braced on a bench, bar padded across the hips | 10–15 |
| Flat bench press | Chest, triceps | Bar lowers to mid-chest, grip slightly wider than shoulders | 8–12 |
| Incline bench press | Upper chest, shoulders | Bench at 30–45 degrees | 8–12 |
| Seated overhead press | Shoulders, triceps | Bar starts at collarbone height | 8–12 |
| Bent-over row | Back, lats | Bar set low, hinge at the hips | 10–12 |
| Standing calf raise | Calves | Balls of feet elevated on a platform | 12–15 |
Smith Machine Workout Plan for Beginners
A beginner routine should run 2–3 full-body sessions per week, using compound movements at 10–15 reps to build movement confidence before increasing load.
Read More: Hertz Car Sales
- Back squat – 3 sets x 12–15 reps
- Flat bench press – 3 sets x 12–15 reps
- Bent-over row – 3 sets x 12–15 reps
- Seated overhead press – 3 sets x 12–15 reps
- Standing calf raise – 3 sets x 15 reps
Add small increments of weight only once your form looks consistent across every rep.
Programming for Established and Advanced Lifters
Established training routine (1–3 years): A four-to-five-day push/pull/legs split in the 8–12 rep range allows more targeted volume per muscle group. Progress by adding either weight or reps weekly rather than jumping load size arbitrarily.
Advanced lifters: This is where the fixed path becomes a genuine tool rather than just a safety feature. Mechanical drop sets-adjusting a bench from incline to flat to decline without re-racking between rounds-extend a set well beyond what’s practical with free weights. Partial-range overload on calf raises or shrugs lets you push closer to true failure with less technical breakdown risk. A common strategy among experienced lifters: perform free-weight compound lifts first in a session while fresh, then switch to smith machine work for isolation and failure-focused finishing sets.
Best Smith Machine for a Home Gym
If you’re investing in a unit for home use, an angled or linear-converging rail generally outperforms a purely vertical track for long-term joint comfort, since it mimics a free barbell’s natural arc more closely. Confirm the counterbalance mechanism and actual bar weight rather than assuming it matches a standard 20kg barbell, and look for safety catches with fine adjustment increments. Weight capacity should sit comfortably above your current working loads to allow for future progress. Since specific models and pricing shift often, cross-check current listings and verified buyer feedback rather than relying on outdated comparison articles.
Final Word
The friction most people feel with a smith machine isn’t a sign to avoid it-it’s almost always a signal to adjust foot placement, bench position, or bar height to match your own proportions. Once that alignment is dialed in, it becomes a legitimately effective tool for muscle growth, safe solo training, and pushing sets past the point where a free barbell would require a spotter. It simply isn’t a substitute for free-weight training when your goal is transferable, functional strength. Pairing this guide with resources on squat form, bench press technique, and progressive overload principles will round out a complete training approach.
Frequently Asked Questions
Why does my smith machine squat feel different at every gym?
Rail angle and counterbalance weight vary by manufacturer, so a squat that feels smooth on one machine may feel awkward on another. If a new machine feels off, treat your first session as a recalibration and adjust your stance distance from scratch rather than assuming your usual setup will transfer directly.
Can I use a smith machine to test my one-rep max?
It’s not a reliable proxy for a free-barbell max, since strength gains are largely specific to the equipment used in training. A smith machine max reflects strength built within that fixed path, not necessarily your capability on a free barbell, so use it to track your own progress within that modality rather than comparing it directly to barbell numbers.
Is it normal for the bar to feel much lighter than it looks?
Yes-most smith machine bars use a counterbalance system that offsets a portion of the true bar weight, so an unloaded bar might only require a few kilograms of actual lifting effort. This is normal and expected, check the machine’s printed specifications if you want an accurate number for tracking purposes.
What should I do if adjusting my stance doesn’t fix knee discomfort?
If repositioning your feet and reducing load don’t resolve the discomfort within a session or two, the issue is likely beyond a setup problem and may involve an underlying mobility restriction or prior injury. At that point, consult a physical therapist or qualified coach rather than continuing to push through pain.
Does a smith machine work for someone recovering from a shoulder injury?
It depends on the specific injury. Some shoulder conditions benefit from the controlled, predictable path since it removes unpredictable movement, while others, particularly certain impingement issues, can worsen if the fixed press angle doesn’t match a safe range of motion for that shoulder. This should be evaluated individually with a physical therapist rather than assumed either way.
How long does it take to get comfortable using a smith machine correctly?
Most lifters adjust within two to four sessions once they understand how to position their feet or bench relative to the fixed bar path for their own proportions. If discomfort or awkwardness persists well beyond that, it’s worth reassessing your setup with a trainer rather than assuming it will resolve with more repetitions.
Can a smith machine replace a squat rack entirely in a home gym?
It can cover a broader range of movements, including squats, presses, and rows, in a single unit, making it space-efficient. However, it can’t fully replace a squat rack for lifters who specifically want to train free-barbell squats and deadlifts, since those movements require an unrestricted bar path that a fixed-rail machine doesn’t provide.
Why do some exercises feel more natural on a smith machine than others?
Movements with a more linear range of motion, like Romanian deadlifts, calf raises, and presses, tend to align well with a fixed vertical or slightly angled path. Movements with a more complex or rotational component, like conventional deadlifts, don’t translate well because the fixed rail can’t accommodate the natural hip-hinge and bar drift involved.
Is it worth alternating between a smith machine and free weights for the same exercise?
Generally, it’s more efficient to choose one modality per movement pattern within a session rather than duplicating the same lift both ways. A practical approach is performing your primary compound lift with free weights early in a workout, then using the smith machine version later for accessory or failure-focused volume once you’re fatigued.
Do beginners need a spotter if they only use a smith machine?
No-the built-in safety catches function as an automatic spotter, which is one of the main reasons this equipment suits beginners training without a partner. As long as the safety stops are set correctly before starting a set, failed reps are caught by the rail rather than requiring outside assistance.
